This post will demonstrate how to configure Unifi to route network traffic via ProtonVPN. These steps can be applied to other VPNs if they support OpenVPN or WireGuard.
Prerequisites:
- You'll need a ProtonVPN account
- You'll need access to your Unifi dashboard
- You'll need to have a network setup in Unifi
I'll be using WireGuard with ProtonVPN however this will work with any VPN client that supports OpenVPN.
Steps for Creating WireGuard VPN Client Configuration: 1. Firstly login into your ProtonVPN account and go to downloads: https://account.protonvpn.com/downloads 2. Once there scroll down to the WireGuard Configuration section: https://account.protonvpn.com/downloads#wireguard-configuration 3. Fill in the first 3 options as follows:
- Device/Certificate Name: Choose a meaningful name, like Proton Secure Core UK
- Select Platform: Choose GNU/Linux
- Select VPN Options: Choose Block malware, ads and trackers (leave VPN Accelerator selected)
- Your setup should look like:
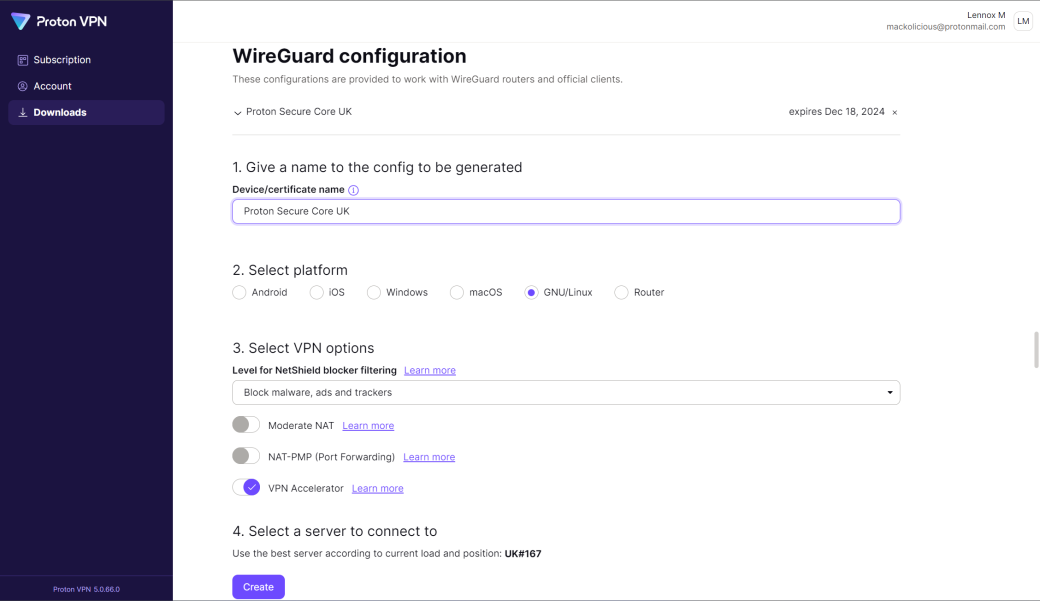

- For option 4 Select a server to connect to: Choose Secure Core configs and then select a country closet to your location to reduce latency.
- Click Create and store the file for later use in Unifi
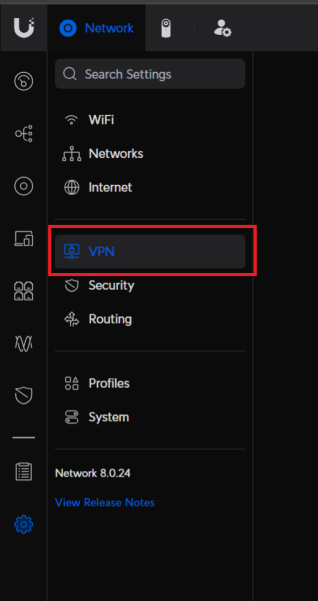
Steps for Creating VPN routing in Unifi: 1. Login to your Unifi dashboard and navigate to the VPN client page: https://unifihost/network/default/settings/vpn/client
- Navigate to settings
- Then VPN
- Then VPN Client

- Ensure that the WireGuard option is selected for the VPN Type
- Give the VPN client a suitable name
- Ensuring that the File option is selected in Setup click Upload and selected the
.conffile that was downloaded from ProtonVPN- The screen will update with the config info
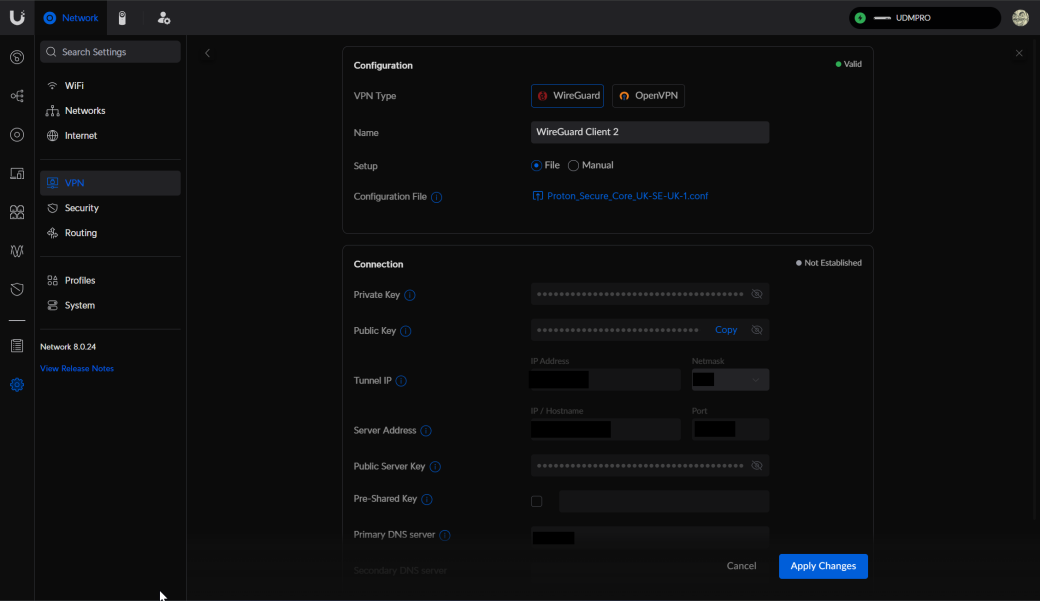
- Hit Apply Changes
- Supply your credentials for ProtonVPN
- The screen will update with the config info
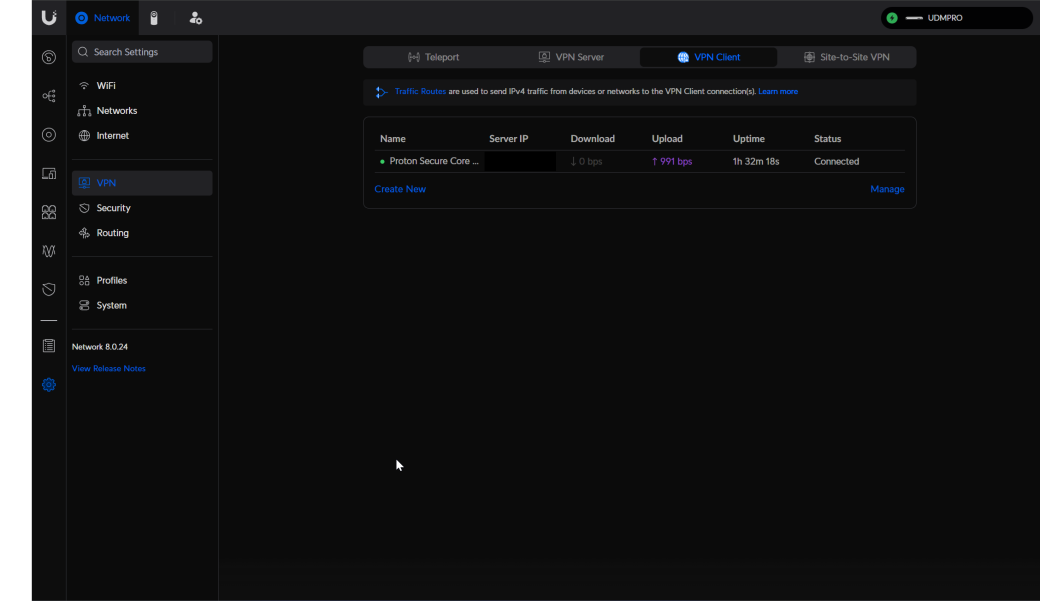
- It make take a couple of minutes but your VPN client should be Connected


Now that we successfully created the VPN client with Unifi we now need to route traffic from our network into that VPN. There are many possible options when it comes to routing traffic via the VPN, however for this post I will be routing the entire traffic from a network via the VPN.
Steps for routing network traffic via a VPN in Unifi: (These next steps assume that you have created private networks within Unifi already) 1. Firstly navigate to the routing page: https://_unifihost/network/default/settings/routing_
- This can be found by going to Settings
- Then going to routing
- Click Create Entry
- You should see a screen similar to the below:
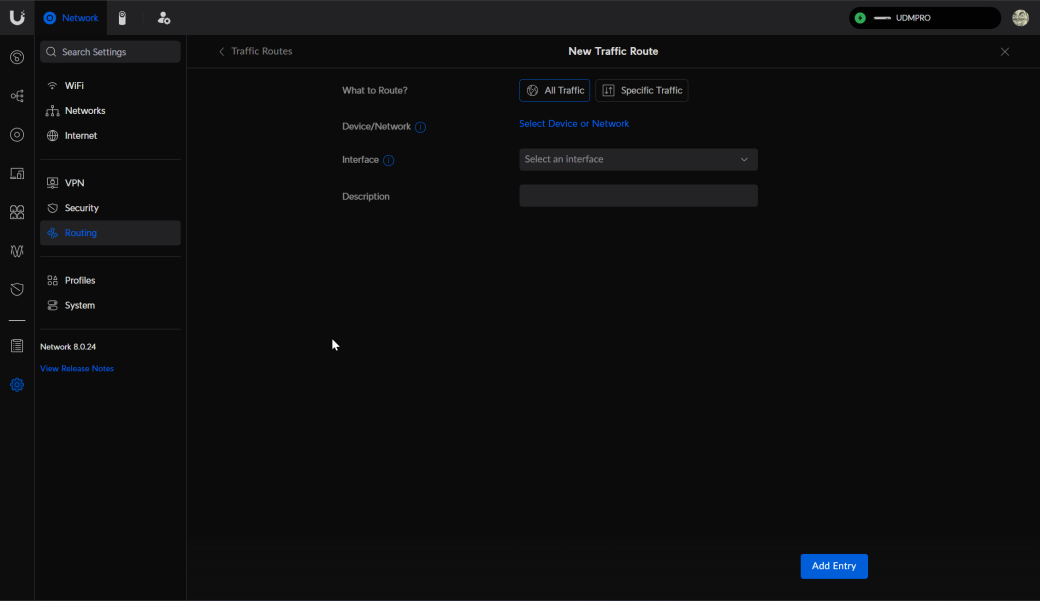
- You should see a screen similar to the below:
- For What to Route? leave All Traffic. For the other options select the following:
- For Device/Network select the name of the network that you want to force VPN traffic through
- For Interface select the Client VPN Connection that was setup in the previous steps
- Give a meaningful description for this route
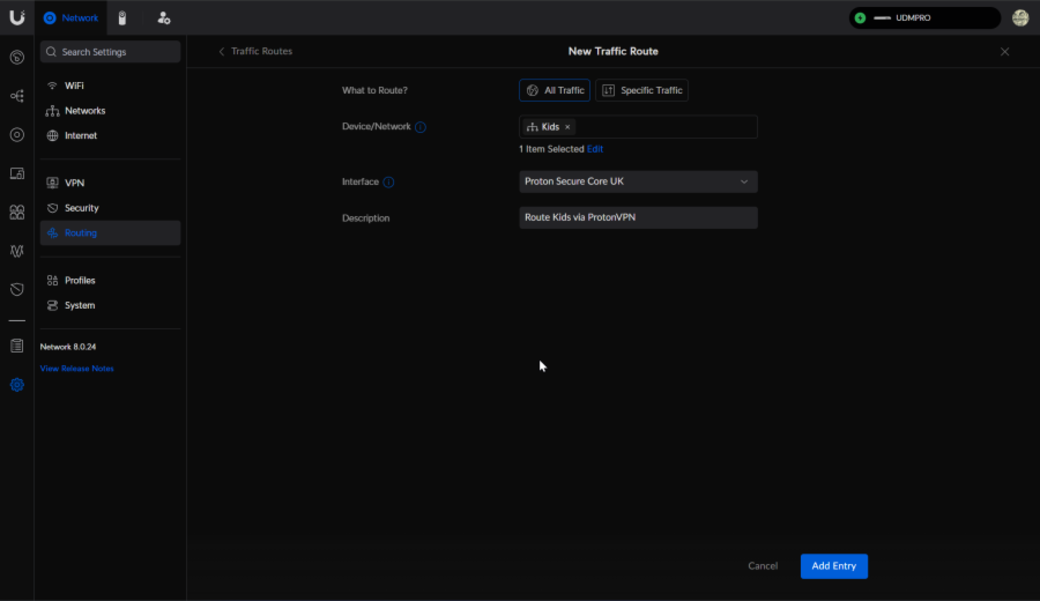
- Then select Add Entry


That network should now be routing traffic via the VPN (you may need to wait a while for the connection to take effect).
You should be able to verify your VPN connection by visiting https://whatismyipaddress.com/ from a device connected to that network and confirming that it's an IP issued from ProtonVPN